Turn Your Kid Into a Certified Draft Detective
A fun, easy guide to teaching kids how to seal drafty windows with weatherstripping and caulk before summer heat arrives.
Why Drafty Windows Are the Perfect Summer Project for Kids
Every house has a few windows that leak air. You might not see it, but you can feel it. Warm air sneaks in during the summer and cool air from your air conditioner slips right back out. This makes your home hotter and your energy bill higher. It also happens to be one of the easiest home problems for a kid to find and fix.
Unlike bigger repairs, sealing a window does not need power tools or a trip up a ladder. It needs patience, a steady hand, and a little curiosity. Kids who are bored in the summer often just need a real job to do. Give them a flashlight and a mission, and most will turn into little detectives searching for hidden drafts.
The Science Behind the Draft
Explain it simply. Air always moves from a warmer space to a cooler one when it can find a gap. In summer, hot outdoor air pushes through tiny cracks around window frames and sneaks into the cool indoor air. Kids usually love this kind of “invisible force” explanation because it feels like solving a mystery rather than doing chores.
Once a child understands why the draft happens, the fix makes a lot more sense. Weatherstripping blocks the gap around a window that opens and closes. Caulk fills the gap around a window frame that does not move. Together, they create a seal that keeps hot air out and cool air in.
What Makes This a Good Beginner Project
- It teaches patience and attention to detail without pressure.
- It uses low-risk tools like a putty knife, a caulk gun, and adhesive strips.
- It gives a visible result kids can point to and feel proud of.
- It builds toward bigger home skills covered in other guides, like the tips found in Kids vs. Drafty Windows: A Summer Sealing Adventure.
Starting with something small like this also builds confidence. A kid who successfully seals one window is far more likely to want to try the next home project on the list.
The Step-by-Step Window Sealing Mission
Before any caulk gets squeezed or any strip gets peeled, walk through the house together and find the problem windows. This part alone can take twenty minutes and it is oddly fun. Turn off the fans, close the doors, and have your child hold the back of their hand near each window frame. If they feel a breeze, that window goes on the list.
Gather the Right Supplies
- Foam or rubber weatherstripping tape
- A small tube of paintable exterior caulk
- A caulk gun sized for kids' hands, or a squeeze tube version
- A plastic putty knife for smoothing
- A rag and a spray bottle of water for cleanup
- Painter's tape to keep lines neat
Skip the metal tools when possible. Plastic scrapers and foam tape are much safer for younger hands and still get the job done.
Doing the Actual Sealing
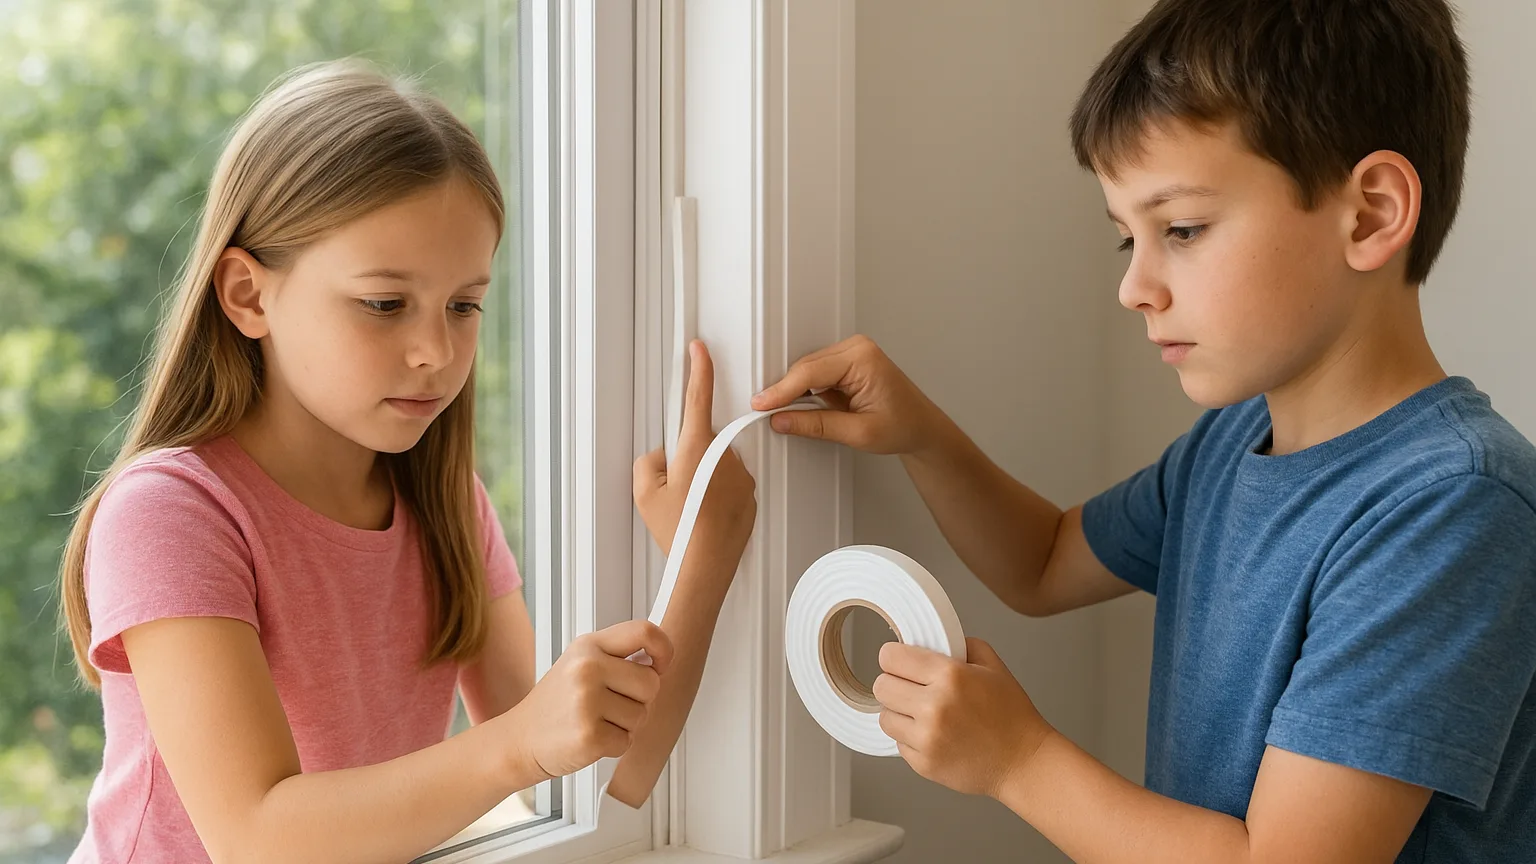
Start with weatherstripping since it is the easiest step. Have your child clean the window frame with a dry rag, then peel the backing off the foam strip a few inches at a time. Press it firmly along the frame where the window meets the sash. This part feels almost like putting on a big sticker, which is exactly why kids tend to enjoy it.
Next comes the caulk. This step needs a little more supervision. Show your child how to hold the gun at a steady angle and squeeze a thin, even line into the gap between the window frame and the wall. A shaky line is fine for a first try. The goal is coverage, not perfection. Once the caulk is in place, smooth it gently with a fingertip covered in a plastic sandwich bag or a putty knife.
Let the caulk dry completely before touching the window again, usually about 24 hours. This is a great time to talk about why patience matters in home repair, a theme that connects nicely with other beginner projects mentioned in Summer Fix-It List: Kid-Friendly Home Repairs That Stick.
Testing the Fix
Once everything is dry, repeat the hand test from earlier. If the draft is gone, celebrate it. If it is not, that is a valuable lesson too. Not every fix works perfectly the first time, and figuring out why is part of learning the skill.

Turning a Chore Into a Real Skill Kids Keep
The real value of this project is not just a sealed window. It is the confidence a child builds from doing a real repair with their own hands. Most kids do not get many chances to fix something that actually matters to the whole household. A sealed window keeps the house cooler, lowers the energy bill, and everyone notices the difference.
“Kids remember the projects where they can see and feel the result right away,” says Daniel Okafor, a home maintenance specialist with Handy Squad. “Weatherstripping and caulking are perfect for that because the improvement is immediate. The room feels different within minutes.”
Make It a Game, Not a Task
Kids respond better to challenges than to instructions. Try turning the project into a small competition or checklist.
- Give each window a grade before and after the fix, like a report card.
- Let your child use a thermometer to record the temperature near the window before and after sealing.
- Create a “Draft Detective” badge or certificate for finishing all the windows in one room.
- Track savings together once the next energy bill arrives.
These small additions turn a simple task into a memory. Years later, most kids will not remember doing a chore, but they will remember the summer they learned to fix something with their own hands.
Safety Reminders Worth Repeating
Even with easy materials, a few basic rules keep things safe.
- Always supervise use of the caulk gun until a child shows steady control.
- Keep caulk and adhesive away from eyes and mouths, especially with younger kids.
- Work in a ventilated room since some caulk has a strong smell while curing.
- Wash hands thoroughly after handling any sealant.
These reminders do not need to slow down the fun. They just help the project stay a positive experience instead of a stressful one.
A Cooler House and a Prouder Kid
Sealing drafty windows might seem like a small task, but it teaches a big lesson about cause and effect, patience, and the satisfaction of fixing something with your own two hands. A kid who learns to spot a draft, apply weatherstripping, and lay down a clean line of caulk walks away with more than a cooler bedroom. They walk away with a small taste of real responsibility, the kind that sticks with them long after summer ends.
By the time the hottest days of the season roll in, your home will feel more comfortable and your child will have a genuine skill to be proud of. It is a simple project, but it plants the seed for a lifetime of confident problem solving, one sealed window at a time.
Related reading: Little Hands, Big Path: A Summer Paver Project for Kids.
Related reading: Kid-Ready Toolkits: A Room-By-Room Repair Checklist.
Find the perfect Materials for your project
This section is designed to simplify the process of choosing the right materials, whether for building, remodeling, or decorating, by providing detailed descriptions, comparisons, and practical tips. Here, you'll find valuable insights and expert recommendations to ensure the materials you choose enhance the durability, aesthetic appeal, and functionality of your project.